The Gosaikunda trek is a popular pilgrimage for locals as well as a popular trekking route for tourists. The area has a lot of importance in both Hinduism and Buddhism making it a wonderful cultural experience. Depending on the Gosaikunda trek route, this trek can take between 6 to 9 days including transportation to the start and end point. Here’s everything you need to know about the Gosaikunda trek route.
Gosaikunda Trek Map
Note: This map should not be used for navigational purposes. It is just meant to give an idea of the route and is not perfectly to scale. Download maps.me on your phone for an accurate offline map that is free to use.
Gosaikunda Trek Overview
Trek Duration
The Gosaikunda Trek route by itself takes at least 6 days to complete including the two days of driving to and from the starting point. However, this trek is often added on to other treks like the Langtang Valley Trek or the Helambu Trek. We combined it with Helambu which made it an 8 day trek, and we didn’t have to walk back the same direction we came. That being said, this overview will only cover the 6 day Gosaikunda Trek. There will be a separate blog post for Helambu
Gosaikunda Trek Difficulty Level
Very Difficult – I found this to be one of the most difficult treks we’ve ever done. Don’t let the lower altitude and short schedule fool you. The first day is a minimum of five hours going up a steep staircase. The second day has a major increase in altitude which can cause altitude sickness. Overall, this trek is more difficult than others.
Required Permits
A Langtang National Park permit is required. It can be purchased in advance in Kathmandu for 3,000 rupees. Check times for the Nepal Tourism Board office as the Langtang desk closes before the other permit desks each day. You can also buy one on the way to Dhunche at the park entrance.
Kathmandu to Gosaikunda
To get from Kathmandu to Gosaikunda, you’ll need to take a vehicle (either a private vehicle or a bus) to Dhunche. From here, it’s a two to three day walk to Gosaikunda. If you are in a time crunch, you can hire a helicopter and visit the lake and return in one day.
Trek History
Although no teahouses or homes existed in Gosaikunda until 1985, the area has an ancient history. Depending on if someone is Buddhist or Hindu, the stories will differ.
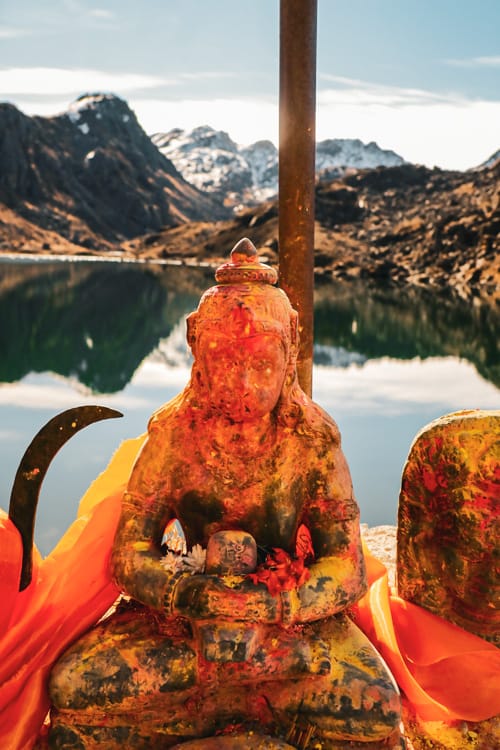
Buddhist believe that the lake is famous because Guru Rinpoche (the founder of Tibetan Buddhism) meditated here around 600 years ago. Many followers come to walk in his path as a pilgrimage. It’s believed by some that meditating where Guru Rinpoche meditated enhances the experience and may lead them to enlightenment.
I tried to gather more information on Buddhist beliefs from the teahouse owners, but sadly they didn’t know any of the history. They did mention the Palace of the Goddess Remati or the Palace of Chakrasamvara, however, they couldn’t explain why the area was referred to as that, and I wasn’t able to find any further information explaining those names. If you know more, please leave a comment so I can update this to be more accurate.
The significance according to Hindus is clear. I’ll try to explain it in the simplest terms for those not familiar with Hindu mythology. It’s believed that demons tried to poison the world with a churning ocean. The only way to save heaven, hell, earth, and all of life was for Lord Shiva to drink the poison. After drinking it, he used his trident to create three lakes. He drank from Gosaikunda to quench his thirst. For this reason, the water is believed to have healing properties. Many come to collect the water to use in puja (religious ceremonies) while others swim in the water to heal their bodies.
Best Time to do the Gosaikunda Trek
The best time to trek anywhere in Nepal is October and November because the visibility and weather is the best. The second best time to trek is usually March and April but in the last few years the views have not been as good.
If you want a unique experience, you can go in August. August is much more dangerous because of the monsoon (so I don’t recommend it), however, it’s the Janai Purnima festival when thousands of pilgrims climb to Gosaikunda.
Gosaikunda Weather
Weather in the mountains changes frequently. There’s even a joke in Nepal that if you don’t like the weather in the mountains, wait five minutes. Weather conditions are best in October and November. Although it’s cold, it’s the safest time to visit with the best views.
Gosaikunda Altitude / Height
4,380 m (14,370 feet)
Gosaikunda Trail Info
The Gosaikunda trek route is typically a well laid staircase going uphill. In some areas, it’s a dirt path. Towards the end, the trek is not steep, but it does go consistently uphill with almost no downhill. On the way back, you’ll go completely downhill with a lot of time spent going down stairs. Overall, this trail is well maintained due to the many pilgrims who follow it.
Navigating the Gosaikunda Trek
Navigating this trek is extremely easy as the Gosaikunda trek route is a well traveled trail. I always recommend downloading maps.me before leaving. This is a free app with the trail that can be used offline (as long as you download the area map in advance). If you do get confused, you can easily navigate your way back to the trail using maps.me.
Packing List
I have a separate post for my packing list as it was too much to include here. Read this blog post for a list of everything I carried with me…
Gosaikunda Lake Trek Packing List
Trip Cost
I’ve written an entire post breaking down what we spent on the trek. You can read it here…
Gosaikunda Trek Route Options
Gosaikunda Trek 6 Days
This is the standard route; however, it is difficult with high altitude increases. Also, you skip sleeping in Laurebina which was the most beautiful village on the Gosaikunda trek route in my opinion. I was sad we didn’t stay there overnight.
Day 1 – Kathmandu to Dhunche by Jeep (5.5 hour drive)
Day 2 – Dhunche to Chandanbari (5 hour walk)
Day 3 – Chandanbari to Gosaikunda (4.5 hour walk)
Day 4 – Gosaikunda to Chandanbari (5 hour walk)
Day 5 – Chandanbari to Dhunche (6 hour walk)
Day 6 – Dhunche to Kathmandu (5.5 hour drive)
Gosaikunda Trek 7 Days
This itinerary adds a night in Laurebina which has the best views of the entire trek. It also gives you time to acclimate to the altitude. We were on a time crunch and couldn’t follow this itinerary, but I was jealous of those who spent a night in Laurebina.
Day 1 – Kathmandu to Dhunche by Jeep (5.5 hour drive)
Day 2 – Dhunche to Chandanbari (5 hours walk)
Day 3 – Chandanbari to Laurebina (2.5 hour walk)
Day 4 – Laurebina to Gosaikunda (3 hour walk)
Day 5 – Gosaikunda to Chandanbari (5 hour walk)
Day 6 – Chandanbari to Dhunche (6 hour walk)
Day 7 – Dhunche to Kathmandu (5.5 hour drive)
Gosaikunda Trek Route Optional Add-Ons
Langtang & Gosaikunda (11 day itinerary)
Gosaikunda & Helambu via Sermatang (8 day itinerary)
Gosaikunda & Helambu via Chisapani (8 day itinerary)
Detailed Gosaikunda Trek Itinerary Breakdown (6 days)
Day 1 – Kathmandu to Dhunche
Kathmandu Altitude: 1,400 m (4,593 ft)
Dhunche Altitude: 1,960 m (6,430 ft)
Daily Altitude Increase: 560 m (1,840 ft)
Oxygen Concentration: 80% compared to 100% at sea level
Driving Time: 5.5 hours
Tea house: Namaste Gosaikunda Hotel & Lodge
Daily Details:
There are two routes to get to Dhunche. We took the route via Tokha since we had hired a private jeep. Along the way, we got to see amazing views of Ganesh Himal and Langtang. We stopped for lunch at Kerung Highway Resort. We also stopped there when we did Langtang last year.
The road is bumpy in some sections with lots of cut back and hairpin turns. I highly recommend a jeep with four wheel drive as we’ve seen many buses and jeeps get stuck during our travels in Nepal. If you get motion sickness, you may want to take medicine in advance because of the sharp turns and speed.
Along the route, you need to go through several police checkpoints as the Tibetan border is nearby. Make sure to have a copy of your passport somewhere easy to reach. Do not put it in your luggage as you’ll need to show it at every stop. Drones are not allowed in the area. They will check your bags and will confiscate them.
Day 2 – Dhunche to Chandanbari (Sing Gompa)
Dhunche Altitude: 1,960 m (6,430 ft)
Chandanbari Altitude: 3,330 m (10,925 ft)
Daily Altitude Increase: 1,370 m (4,495 ft)
Oxygen Concentration: 68% compared to 100% at sea level
Walking Time: 4 hours and 45 minutes walking time (not including lunch or tea breaks). We took two tea breaks which were a half hour each. We also took a 45 minute lunch break. The total travel time was 6 hours and 30 minutes.
Distance: 7.4 km (4.6 miles) walking distance
Difficulty Level: Very Difficult
Tea house: Buddha Guest House or Red Panda Inn
Daily Details: The first day of walking is extremely difficult because it is almost entirely uphill. The day starts off by following a dirt road through town for about 30 minutes. After that, it’s a short walk in the jungle along the river for 20 minutes followed by a steep uphill climb for almost an hour.
We decided to take a long tea break after the uphill climb at Srijana Hotel & Lodge for 30 minutes. From there it’s another hour straight uphill with no flat areas for an hour. We had lunch at Deurali Hotel & Lodge which took 45 minutes. Often, the teahouses cook items from scratch, so it can sometimes take over an hour for lunch. If you have a porter, you can send them ahead with your lunch order to save time.
After lunch, it’s yet another 45 minutes of climbing uphill. Here you’ll reach a small viewpoint. From the viewpoint, you’ll go uphill until you arrive in Dhimsa. This section is not as steep as the previous portions, but it is still uphill. We stopped for another tea break in Dhimsa because I was exhausted. The last section from Dhimsa to Chandanbari is also uphill, but it’s not nearly as bad as the first half of the day.
Overall, this is one of the hardest days of trekking I’ve ever completed. I was so tired at the end that I crashed into the bed. We had originally planned to walk to Laurebina, but there was no way we would have made it there.
Pro Tip: Do training in advance by using a stair stepper or going up and down a set of stairs at least 20 times a day.
Day 3 – Chandanbari to Gosaikunda
Chandanbari Altitude: 3,330 m (10,925 ft)
Gosaikunda Altitude: 4,380m (14,370 ft)
Daily Altitude Increase: 1,050 m (3,445ft)
Oxygen Concentration: 60% compared to 100% at sea level
Walking Time: 5 hours and 15 minutes walking time (not including lunch or tea breaks). We stopped for a 40 minute tea break and a 40 minute lunch break along the way. Our total travel time was 6 hours and 35 minutes.
Distance: 9 km (5.6 miles) walking distance
Difficulty Level: Difficult
Tea house: Namaste Guest House
Daily Details:
The day starts with a beautiful path that wraps around the hills in the sunshine. It’s fairly flat with some steady but not steep uphill sections. Make sure to look behind you once in a while as the views behind you are beautiful on a clear day.
After a little over an hour, the trail turns into a pine forest. Through the trees on the left, you get glimpses of the Himalaya mountains. There’s an uphill climb through the woods, but it’s not as bad as day one. The views are stunning and it makes the trek worth every step.
After 25 minutes, you’ll reach Cholangpati for tea. We stopped at Hotel Langtang Lirung View for 30 minutes to take in the views and enjoy the fresh morning air.
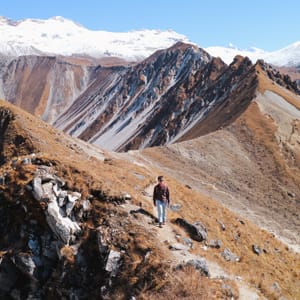
From here, the path goes uphill the rest of the way until you reach Laurebina. This takes about an hour, but the views are indescribably beautiful. We probably stopped to take photos every 100 feet. This section is, in my opinion, the best part of the trek, so enjoy it and don’t rush too much.
We had lunch in Laurebina at the Mountain View Rest House so that we could enjoy the epic views. I don’t think I’ve ever seen so many mountains this close up. Usually, you only see one major mountain at a time which makes this place special. I wish we had added an extra day to stay here like many of the other travelers did.
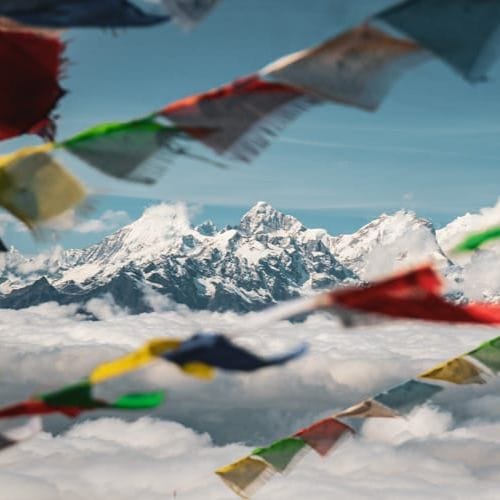
It takes us about an hour and fifteen minutes to get to the top of the hill above Laurebina. Other people breezed past us, but I was struggling with the altitude increase and my body hurt from the steep climb the day before. We also stopped for a lot of photos while tour groups seemed on a mission to get to the top as fast as possible. At the top, there’s a nice area to sit with a small Buddha statue and prayer flags dancing in the wind.
The next section runs along the cliffs. There are some steep uphill areas mixed in but nothing too bad. It feels much worse because of the altitude. Unfortunately, I was struggling at this point. I tend to hit a wall after so many hours of walking. I now know this is because I have Fibromyalgia, but I basically get so exhausted that I can’t cope. During the walk along the cliffs, my whole body ached. It took us about two and a half hours, but it took most people two hours to get to Gosaikunda from Laurebina.
Gosaikunda is a tiny village with views of a few different lakes. We arrived around 3:15pm after walking slowly, stopping for photos, and struggling with the fast increase in altitude. Once we arrived, we did an acclimation hike nearby to help us adjust to the altitude. We also decided to take altitude medicine. We almost never take Diamox, but the altitude increase on this trek is fast. If you stay in Laurebina you may not need medicine. Make sure to ask a doctor before using it as there are side effects.
Pro Tip: Leave early so that you can get to Laurebina early enough to enjoy the clear skies. Clouds tend to roll in around 10:30am in the mountains. If you can, add a night to your itinerary to sleep in Laurebina because it’s the most beautiful part of the trek.
Day 4 – Gosaikunda to Chandanbari
Gosaikunda Altitude: 4,380m (14,370 ft)
Chandanbari Altitude: 3,330 m (10,925 ft)
Daily Altitude Decrease: 1,050 m (3,445ft)
Oxygen Concentration: 68% compared to 100% at sea level
Walking Time: 5 hours (not including lunch or tea breaks)
Distance: 9 km (5.6 miles) walking distance
Difficulty Level: Moderate
Tea house: Buddha Guest House or Red Panda Inn
Daily Details:
We decided to add the Helambu Trek onto our itinerary on the way down, so we went back in a different direction, but I’ll write a separate post about that. If you do the Gosaikunda trek route by itself, you will head back to Chandanbari the same way you came. It takes about 5 hours to walk back. There are some steep downhill sections so you may want to bring trekking poles for support of your back and knees.
Day 5 – Chandanbari to Dhunche
Chandanbari Altitude: 3,330 m (10,925 ft)
Dhunche Altitude: 1,960 m (6,430 ft)
Daily Altitude Decrease: 1,370 m (4,495 ft)
Oxygen Concentration: 80% compared to 100% at sea level
Walking Time: 6 hours (not including lunch or tea breaks)
Distance: 7.4 km (4.6 miles) walking distance
Difficulty Level: Very Difficult
Tea house: Namaste Gosaikunda Hotel & Lodge
Daily Details:
From Chandanbari to Dhunche is about 6 hours depending on how easily you can go downhill. Be sure to bring any back or knee support you may need. This day is just walking down stairs for hours which can be rough on your knees. I recommend taking trekking poles so you can use your arms more and take pressure off your legs. If you’re young and fit you can probably jog down this no problem, but those over 40 years old or anyone with an old injury or knee issues will probably need to go a little slower.
Day 6 – Dhunche to Kathmandu by Jeep
Dhunche Altitude: 1,960 m (6,430 ft)
Kathmandu Altitude: 1,400 m (4,593 ft)
Daily Altitude Decrease: 560 m (1,840 ft)
Oxygen Concentration: 85% compared to 100% at sea level
Driving Time: 5.5 hours
Daily Details:
This drive is the same one as the way there. I recommend leaving early to avoid traffic and hiring a private jeep which is typically safer and more relaxing than the bus. It takes about 5.5 hours to get back to Kathmandu.
Gosaikunda Trek Village Guides
Chandanbari (Sing Gompa) Village Guide
You might also like…
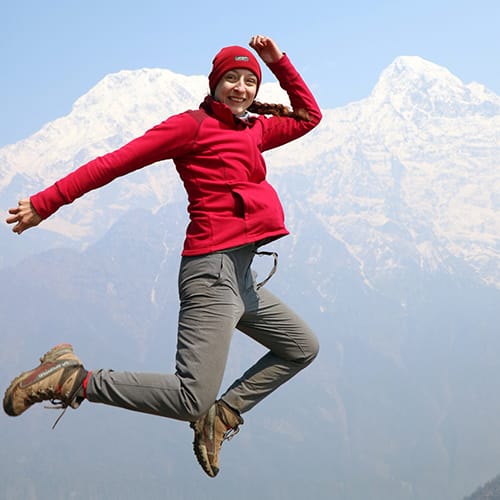
Michelle Della Giovanna
Writer at Full Time Explorer
I’m just your average New Yorker who quit her job in the fashion industry to explore the world. Come find out what it’s like to trade in five-inch heels for squat toilets.
As a Buddhist believer, of course I have to challenge Gosaikunda trekking, thanks for your map, I think it is a must-do adventure in my life!
Enjoy! It’s really a lovely trek with so much meaning. I’d recommend going to Helambu on the way down as that is the trail Guru Rinpoche followed and many sites can be visited along the route.
Pawna Lake Camping is one of the highly recommended camping by visitors
as it make your weekend worth with night party, corporate team buildin
Thank you. It’s amazing how you’ve managed to capture the essence of each destination, making me feel like I’m right there experiencing it all firsthand.
Thank you so much for your kind words!
nepal is very beautiful place have been many times but never heard about this trek will surely look for it
thank for sharing
Pawna lake camping is the most visiting camping place near mumbai.
Newars of Kathmandu has a folklore related to holy travel (tirtha) to Silu (Gosaisthan)from Kathmandu and an organic Silu Song of a semi-tragic travel of an insistent spouse who shadows her husband all the way despite admonishments from husband.not to follow her. Tragedy was she was later kidnapped by a local king .However she managed to escape befooling the setup by a pseudoholy fasting she conducted to escape.
Wow thanks for sharing. I haven’t heard that story before. There are so many interesting stories about the area!
Amazing article and photographs, thank you