We chose a five day Mardi Himal Trek itinerary after consulting several friends who had done the trek. A few groups did it in three days but called it words like “difficult, brutal, and unnecessary.” The four day trek didn’t look that much better. We then talked to people who did it in six days and they described it as “too long,” so we settled on the perfect five day itinerary. I felt this length for the trek was difficult enough to keep us from being bored, but it was easy enough that the first time trekkers in our group could manage it without wanting to quit.
Mardi Himal Trek Map
Note: This map should not be used for navigational purposes. It is just meant to give an idea of the route and may not be perfectly to scale. Download maps.me on your phone for an accurate offline map that is free to use.
Mardi Himal Trek Overview
Duration
5 Days (although it can be done in as few as 3 days or as many as 7 days)
Mardi Himal Trek Difficulty Level
The five day itinerary is a moderate trek. The first day is steep. The second day is difficult because it is so long. The last day requires a steep downhill which is hard on the knees. Day three and four, I found enjoyable. If you do the trek in three days, I would say it’s a very difficult trek, and if you do it in six days, it should be easy. The five day itinerary felt just right.
Required Permits
An ACAP (Annapurna Conservation Area Project) permit is required for all foreigners. This cost 3,000 rupees which is less than $30 USD.
Mardi Himal Trek History
The Mardi Himal Trek formed only 10 years ago in 2010. Prior to that, this route was mostly camping grounds visited by expeditions. Some of the route was part of the original Annapurna Base Camp Trek, and later it branched off and headed towards Mardi Himal. With its epic views, it’s no surprise that within 10 years, it’s become one of the most popular short treks in all of Nepal.
Best Time to Visit Mardi Himal
Trekking season in Nepal is from March to May in the spring and late September to early December in the fall. A large chunk of this trek goes through a rhododendron forest which is breathtaking in late March and early April when all of the flowers are in bloom. If you can arrange your schedule for that time of year, it’s an added bonus. The trail is not safe in monsoon season and may be very cold with snow in winter.
Mardi Himal Height
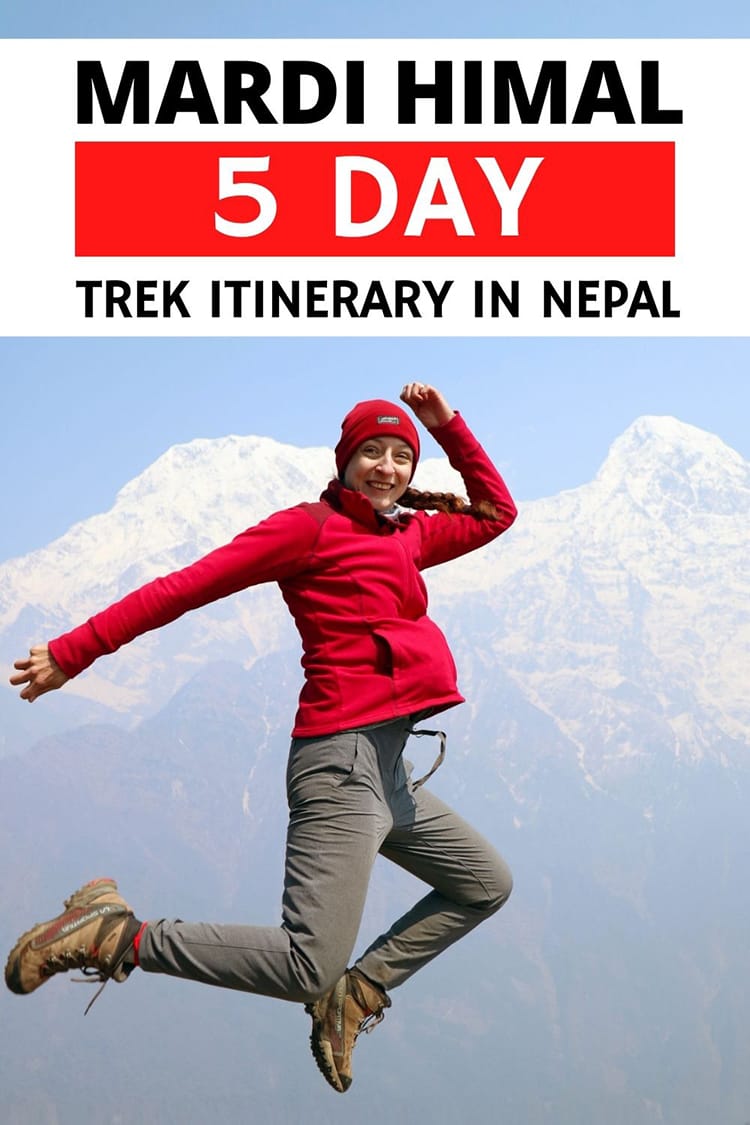
Mardi Himal stands at 5,587 m (18,330 ft). Although it is not that tall compared to the other mountains nearby, it does sit right in front of Machhapuchhre which translated means “fish tail.” From the Mardi Himal Trek, you get epic views of this unique mountain which does in fact look like a fish tail. Standing at 6,693 m (21,958 ft) and located so close to the trekking trail, it towers above the other mountains in the distance.
Mardi Himal Base Camp Height
Mardi Himal has two base camps. The one located along the Mardi Himal Trek is considered Mardi Himal Base Camp West and is 4,500 m (14,763 ft) in altitude. Many people only go to the viewpoint located just below Base Camp. The viewpoint is situated at 4,200 m (13,779 ft).
Mardi Himal Trail Info
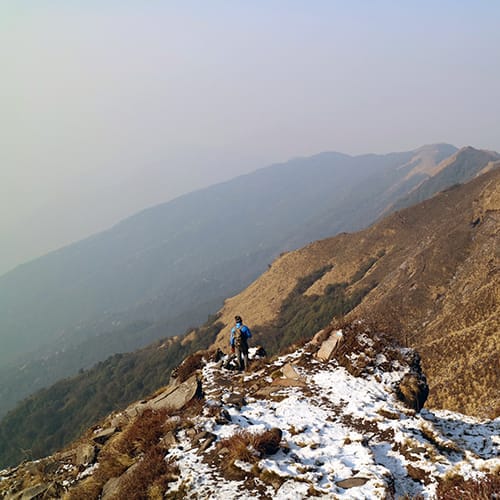
The Mardi Himal trail is nice with gorgeous dirt paths most of the way and stone steps installed in the places where dirt is difficult to ascend or descend. The trail runs through the jungle, rhododendron forests, and up to snowy peaks. The diversity in flora that you see in five days is amazing.
Navigating the Mardi Himal Trek Route
I always recommend inexperienced trekkers to take a guide or porter who can show you the route. If you are experienced and don’t plan to take a guide, I recommend downloading Maps.me on your phone. It’s an app which has trails marked. You can download the offline version which will show you exactly where you are and where the trail is. This came in handy a few times including our push to the viewpoint before sunrise when the snow covered trail got a bit confusing. We ended up about 20 feet below the trail and had to readjust to get back on route.
Overall, the Mardi Himal Trek route is easy to navigate. The route does split in many places and both paths usually lead to the same place, however, one path is much more difficult than the other which is why a guide is handy.
Packing List
I have an entire post for my packing list as it was too long to include in this post. You can check it out here… Mardi Himal Base Camp Packing List
Trip Cost
I also have an entire post dedicated to my budget and how much we spent on the trek. You can check it out here… Mardi Himal Trek Cost
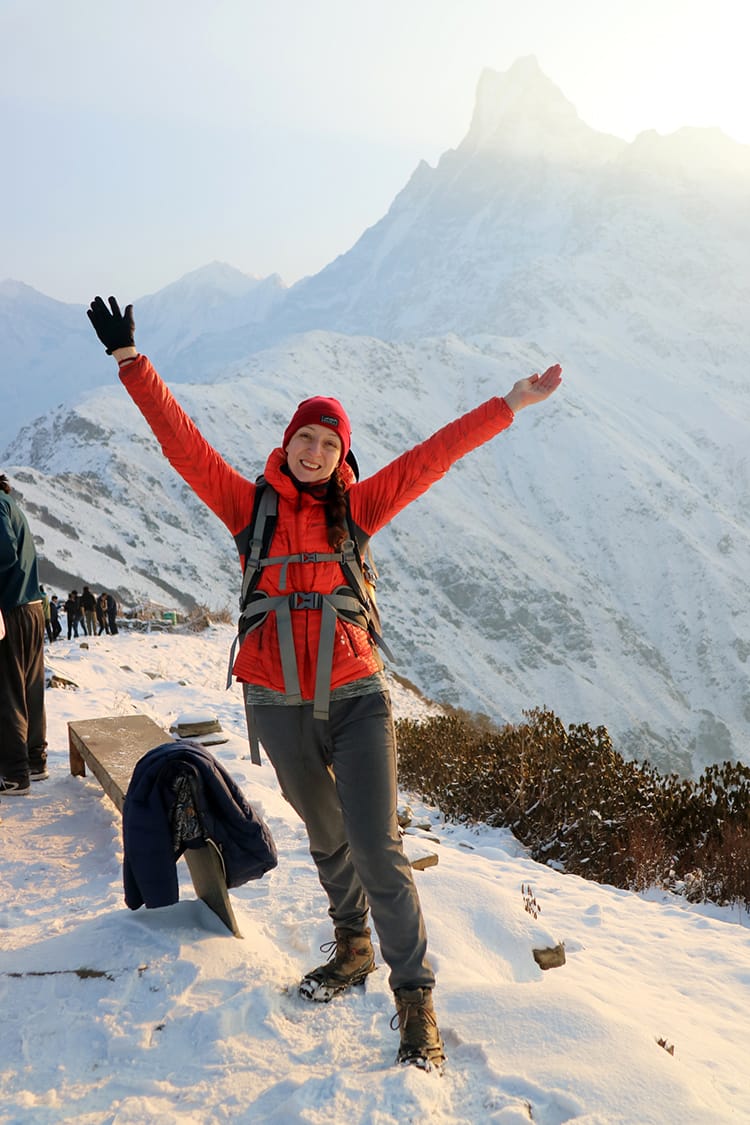
Brief Mardi Himal Trek Itinerary
Day 1 – Pokhara to Kande (by jeep) & Kande to Pittam Deurali (option to go to Lovely Hill)
Day 2 – Pittam Deurali to Low Camp
Day 3 – Low Camp to High Camp
Day 4 – High Camp to Base Camp & Base Camp to Low Camp
Day 5 – Low Camp to Sidhing & Sidhing to Pokhara (by jeep)
Detailed Mardi Himal Trek Itinerary
Day 1 – Pokhara to Kande to Pittam Deurali
Kande Altitude: 1,770 m (5,807 ft)
Pittam Deurali Altitude: 2,100 m (6,889 ft)
Daily Altitude Increase: 330 m (1,082 ft)
Oxygen Concentration: 79% compared to 100% at sea level
Driving Time: 1 hour
Walking Time: 2 hours 10 minutes (not including lunch or tea breaks)
Difficulty Level: Difficult
The jeep ride to Kande was surprisingly quick and smooth on a newly paved road. We had hired a private jeep expecting it to be a bumpy ride. If we hadn’t had so much luggage, we easily could have taken a car. We left Pokhara at 9:40am and arrived at 10:40am.
From Kande the path goes straight up a set of stairs for about 40 minutes. The stairs are in direct sunlight and we arrived around 11am which made the hike extremely hot. I’d recommend getting there earlier. Make sure to have a sun hat and sunscreen on before you start. After reaching the top of the hill, it’s an easy walk for about 20 minutes to get to Australian Base Camp.
Since we arrived late in the day, we had lunch at Australian Base Camp at Hotel Gurans. From there, it’s a quick 20 minute walk through the woods to Pothana. This section of the trail is enjoyable as it’s mostly flat.
We had originally planned to stay in Pothana which is a cute village with lots of appeal, however, we arrived around 12pm and knew the next day would be much harder. Our guide recommended we walk to the next village of Pittam Deurali to make the next day easier.
The next leg of the journey took us only 50 minutes. The trekking trail meets a road a few times, but you can avoid the road almost completely. You’re never on it more than 20 seconds. This path has some sections that are steep, but for the most part, it’s an enjoyable and gradual uphill trek to Pittam Deurali. We arrived at Pittam Deurali at 3:00 pm but could have arrived much earlier had we left Pokhara earlier.
In Pittam Deurali, we stayed at the Nice View Lodge which had nice rooms with attached bathrooms. The hotel had been renovated recently and felt luxurious compared to other tea houses. I enjoyed our stay in Pittam Deurali and was extremely happy we didn’t stop at Pothana. The next day’s walk was long and for those who have the energy, I would recommend walking an additional one stop further on the first day. If I were to do the trek again, I would sleep in the tiny village of Lovely Hill which we passed through on day 2.
Day 2 –Pittam Deurali to Low Camp
Pittam Deurali Altitude: 2,100 m (6,889 ft)
Low Camp Altitude: 2,970 m (9,744 ft)
Daily Altitude Increase: 870 m (2,854 ft)
Oxygen Concentration: 71% compared to 100% at sea level
Walking Time: 5 hours and 40 mins (not including lunch or tea breaks)
Difficulty Level: Difficult
We left Pittam Deurali around 9:00am and walked to Lovely Hill where there’s a teahouse with a great view. It took us about 50 minutes to arrive, but I was walking slow and enjoying my surroundings. The walk here is simply stunning as it passes through the jungle. The trail is mostly flat with some gradual uphill climbs. I felt that we easily could have walked this section the day before, but at the time we didn’t know how long day 2 would be.
After Lovely Hill, it’s another gorgeous walk through the jungle on gradual ground. There is one section which goes uphill. It’s not too steep, but it is a long section and took us about 20 – 30 minutes to ascend. We arrived at Forest Camp around 12:30pm and had lunch at Green View Hotel.
After an hour and a half break for lunch (this is how long it typically takes for them to cook and for us to eat), we moved on. Unfortunately, it was getting late in the day, and the weather started to turn around 2:00pm in the mountains. On this day, it got cloudy, cold, windy, and started to drizzle which made the rest of the day much less enjoyable.
From Forest Camp, there’s about a 400m increase in 2 hours of walking, so you end up on a continuous uphill climb to Low Camp. This normally wouldn’t be too difficult, but we’d already been walking for 3 hours (and ascended 400m) and were eager to get to the next destination before it rained too hard. By the time we made it to Low Camp, we were all freezing and exhausted. We arrived around 4:00pm and stayed at Hotel Laligurans.
Staying at Lovely Hill the night before would have cut off almost an hour of walking on day 2 and made the day a lot easier.
Day 3 – Low Camp to High Camp
Low Camp Altitude: 2,970 m (9,744 ft)
High Camp Altitude: 3,540 m (11,614 ft)
Daily Altitude Increase: 570 m (1,870 ft)
Oxygen Concentration: 66% compared to 100% at sea level
Walking Time: 2 hours and 35 minutes (not including lunch or tea breaks)
Difficulty Level: Moderate
Day 3 felt easy compared to day 2 despite the altitude. We left Low Camp at 9:30am. On this day, you pass through another village that has three tiers of tea houses that are spread out. This village is called Badaldada and was not shown on our map.
The trek to the first tier of Badaldada is an uphill climb. We ended up on a shortcut through the woods which was steep. There is a longer route that zig zags back and forth and is more gradual. It took us about 35 minutes to get to the first tier of the village.
The route to the second tier took us about 20 minutes. During this day, you pass through beautiful rhododendron forests. If you’re there at the end of March or beginning of April, you can witness them in full bloom. The rhododendron is the national flower of Nepal. This section is also uphill, but not as steep as the first section.
Another 20 minutes of gradual uphill and we arrived at the third tier of the village which is located at an altitude of 3,310m. This top set of teahouses is higher end. You can even order a real cappuccino (although it’s expensive). We stopped here for tea. This top section offers incredible views of the surrounding mountains on a clear day.
Around this time, the trees and foliage begin to disappear and the landscape becomes more barren. About an hour and a half later, we arrived at High Camp. This last leg of the day, we walked slow as some of the group was beginning to feel the altitude. Even I was getting a little lightheaded. This section is a mix of dirt path and stone steps. It has gradual sections followed by steep staircases, but overall, I found it an extremely enjoyable walk.
After arriving at High Camp, my head felt foggy, so we opted to do an acclimation hike. The best way to avoid altitude sickness is to “climb high and sleep low.” This means that you should go up about 100m higher than you will sleep, then return to the tea house. We walked up the route to Base Camp for about 25 minutes and checked out the route we would be taking in the dark the next day. After returning, my head was clear and I felt good as new.
We stayed at High Camp Guest House. I enjoyed this tea house but would recommend choosing your room wisely. We made the mistake of picking the one in front of the bathrooms and were woken up all night by people going in and out which was not ideal when we planned to wake up at 3:00am the next morning.
Day 4 – High Camp to Base Camp to Low Camp
High Camp Altitude: 3,540 m (11,614 ft)
Base Camp Altitude: 4,500 m (14,763 ft)
Low Camp Altitude: 2,970 m (9,744 ft)
Daily Altitude Increase: up 960 m (3,149 ft) to Base Camp and down 1,530 m (5,019 ft) to Low Camp
Oxygen Concentration: 59% at Base Camp compared to 100% at sea level
Walking Time: 9 hours and 45 minutes (5 hours and 45 minutes to the viewpoint, 1 hour to Base Camp, 3 hours down to Low Camp) not including breakfast or tea breaks.
Difficulty Level: Difficult going to Base Camp, but easy going down.
It’s common practice to wake up at the crack of dawn when doing the final leg of your trek in Nepal. There are several reasons for this. First, visibility and views are almost always the best in the morning. Winds are also at their lowest in the morning, making it the safest time to climb at altitude. Last, I find it easier to climb in the dark because you can’t see how far away the goal is which makes it mentally much easier.
We left High Camp at 3:45, slightly behind our original scheduled departure of 3:15. There are two routes to High Camp. One is safe but long (an extra 30 minutes). The other is short but dangerous. We looked at the routes the day before on our acclimation hike, and honestly, as an avid trekker with experience, I have no idea why anyone would take the difficult route. It’s a straight uphill climb on slippery rocks with a cliff on the side that you wouldn’t survive if you fell over. Therefore, I highly recommend anyone reading this to spend an extra 30 minutes doing the safer route. It’s also worth noting that every person we met who took the difficult route regretted it afterwards.
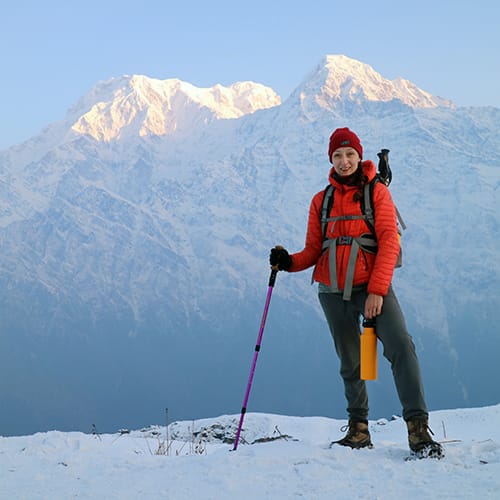
Prior to the route splitting, there’s a fun little rock climbing section that lasts about 10 minutes. After that, the safe route goes off to the right and is an easy gradual climb uphill. When it meets the other trail, it becomes steeper, but it’s still not too bad as long as you take it slow. About halfway up, the snow became deeper and we put on our crampons to help with our footing. These were a lifesaver and made walking so easy. The hardest part of this section is the altitude which makes it harder to breathe.
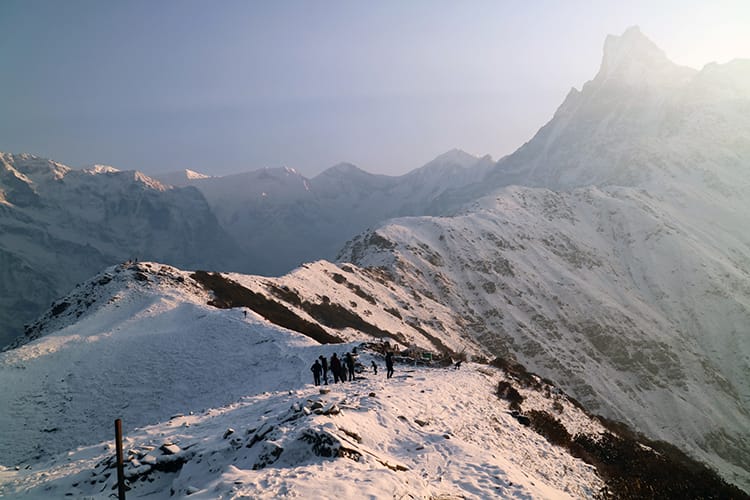
The last 20 minutes before the viewpoint (4,200m) is a straight uphill climb on a steep stone staircase. This part was brutal for me, and I had to keep stopping. I was having some stomach issues and struggled a lot here. We reached the top of the staircase just as the sun was peeking over the mountains at 6:20am.
At the viewpoint, there are two small tea shops where you can rest. We talked to the tea shop owner who we had met at Low Camp, and he advised us that the snow made it dangerous to go onto Base Camp. I was already feeling sick as I had a stomachache all morning and had already decided that I’d pushed myself hard enough for one day.
Later in the day, we ended up meeting the only guy who went to Base Camp that morning, and he described it as, “Unlike anything I’ve ever done. There were points, I literally thought I’d die.” He had a professional guide with him who knew the route well. It took him about an hour to go up to Base Camp and back to the viewpoint, but they had to break trail in the snow. Locals told us we could get to Base Camp in 30 minutes (on a good day without snow) as it is not as steep as getting to the viewpoint.
We spent a lot of time at the viewpoint taking photos and having tea (about an hour and a half). Since we had crampons, we could practically jog down the mountain without slipping or sliding. We got downhill in about 1 hour and 15 minutes while people without crampons had to tread carefully and took much longer. We took a two hour break at High Camp for breakfast and then walked downhill to Low Camp.
It took us about 1 hour and 20 minutes to reach the top tier of Badaldada where we stopped for some WeiWei noodles at Himalayan Majesty Hotel. We were moving at a leisurely pace after such a long morning and wanted to enjoy the epic views which made the mountains viewable all the way till 1:00pm. Since we hadn’t seen the mountains the whole trip we took hundreds of photos on the way down and kept stopping to sit and look at them.
It took another 1 hour and 15 minutes to reach Low Camp. It’s a steady downhill walk with stone steps added to the areas where it’s a little steep. Most of our group has bad knees or backs despite all being in our 30’s and 40’s. Therefore, we all used trekking poles. Suraj used a back support. I used a knee and ankle support. These things helped immensely since landing on hard stone while going downhill for a few hours takes a toll.
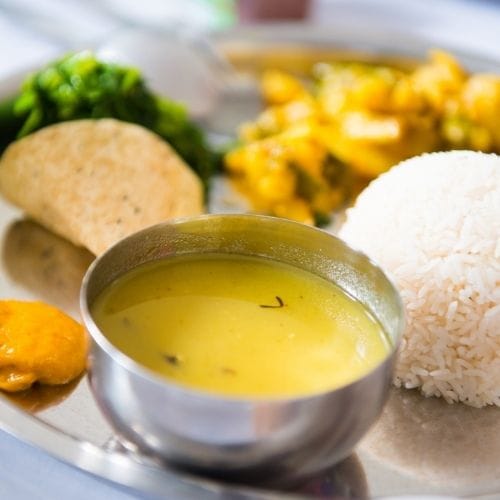
Overall, it was a long day, but it was enjoyable! We slept at Hotel Laligurans again on the way down. I highly recommend trying their potato curry with fresh cilantro and onion on top served with Tibetan Bread! It was the best thing I ate on the entire trek.
Day 5 – Low Camp to Sidhing to Pokhara
Low Camp Altitude: 2,970 m (9,744 ft)
Sidhing Altitude: 1,700 m (5,577 ft)
Daily Altitude Decrease: 1,270 m (4,166 ft)
Oxygen Concentration: 87% compared to 100% at sea level
Walking Time: 2 hours and 30 minutes (not including lunch or tea breaks)
Driving Time: 2 hours
Difficulty Level: Easy but if you have bad knees this day will be difficult
There are two options for Day 5. You can do a gradual but long downhill walk to Kande which takes about 5 hours and is the same route you took uphill. From Kande, you take a one hour car ride to Pokhara on a paved road. This way is cheaper for those on a budget as the car to Kande is less expensive than option number two.
The second option is shorter but steeper. You walk 2 hours and 30 mins on a steep downhill which is hard on the knees. This path was extremely dusty and gave me awful allergies. I had to walk ahead of everyone to avoid dust being kicked up, and had to wear a face mask. This route takes you to Sidhing where local jeeps can drive you to Pokhara or you can hire a private jeep to pick you up. The local jeeps sometimes squeeze too many people in, don’t have seat belts, and drive recklessly. We hired a private jeep despite the added cost.
The drive from Sidhing to Pokhara is about 2 hours and is more adventurous than the trek. It’s 30 minutes of driving on a dust road with giant rocks. There are a lot of cut back turns and a cliff on one side. The road is only wide enough for one car, and luckily, we never ran into anyone going the other direction. After the initial 30 minutes of madness, it’s another 20 minutes on a not so bad road followed by an hour on a good road.
After taking a poll, we all agreed that we would have rather walked the extra two hours in the gorgeous woods than take the jeep on the scary road. That being said, we didn’t walk the other way, and there may have been different difficulties that way as well. At the very least, I would recommend walking past Sidhing another 45 minutes and having the jeep pick you up further down the road to avoid the dangerous section.
Booking.com
Mardi Himal Trek Village Guides
These village guides have information about the stopping points along the way to Mardi Himal Base Camp including the number of tea houses, price of rooms and food, cell service, wifi, cultural information, history of the area and more!
- Australian Base Camp Guide
- Pothana Guide
- Pittam Deurali Guide
- Forest Camp Guide
- Mardi Himal Low Camp Guide
- Mardi Himal High Camp Guide
You might also like…
Michelle Della Giovanna
Writer at Full Time Explorer
I’m just your average New Yorker who quit her job in the fashion industry to explore the world. Come find out what it’s like to trade in five-inch heels for squat toilets.
Our mountaineering club completes 50 years. We are all senior citizens now. We wanted to do this trek in October. We want to know the possibility first and then some agency who could handle this. Could you guide us?
October is a fantastic time to do this trek! I recommend Beyul Treks. They can arrange the trip for you. They’re very professional and have great guides ? https://www.beyultreks.com
Thanks for this. Hoping to do it again with a friend in March ’24. I last did it about 5 years ago in March. We could not get more that a couple of hundred metres beyond High Camp due to very deep snow, and there had been a death beyond High Camp so my guide said ‘no’. I’m experienced enough not to argue. I found the hardest part was the descent from Low Camp to Sidhing, my 70 + knees suffered. There was no respite on that descent. Thanks for the data for each day. That’s going to help plan properly for our next trip. I think we just stopped when we were tired last time and we ended up on a 6 day itinerary. Done 9 treks in Nepal love the place. Only Covid stopped me getting back there over the last 5 years. Thank you.
I’m so happy you found the article helpful. We were able to get past High Camp to the view point, however, we weren’t able to reach Base Camp either due to snow. I believe since that death, they’ve created a longer but safer route to the view point. We chose not to do the shortcut which was slippery and had a cliff on one side. So, it should be safer to get to Base Camp/the view point this time.
Thank you for sharing this detailed Mardi Himal Trek itinerary! The insights on each day’s trek and the trail map are incredibly helpful for planning my trip. I can’t wait to experience the stunning views you described. Do you have any tips for first-time trekkers?
This post is incredibly helpful! The detailed itinerary and trail map make planning the Mardi Himal Trek so much easier. I can’t wait to experience the stunning views and unique landscapes you described. Thanks for sharing your insights!
What an informative post! The detailed itinerary and trail map for the Mardi Himal Trek are incredibly helpful. I’m particularly excited about the tips for acclimatization you mentioned; they’ll definitely come in handy. Looking forward to planning my trek soon!
Thank you for the detailed itinerary! The 5-day route looks amazing, and I appreciate the trail map included. I’m particularly excited about the views from Mardi Himal Base Camp. Any tips on what to pack?
Thanks for sharing this detailed itinerary for the Mardi Himal Trek! The tips and trail maps are super helpful for planning. I’m especially excited about Day 3’s highlight views. Can’t wait to hit the trail!
I just finished the Mardi Himal Trek, and your detailed itinerary was incredibly helpful! The day-by-day breakdown made planning so much easier, and the trail map was spot on. Can’t wait to share my own experiences and photos! Thank you for such a fantastic resource!
I just finished reading the Mardi Himal Trek itinerary, and it looks amazing! The details on each day’s trek and the stunning views you can expect have me super excited to plan my trip. I appreciate the helpful trail map too—it’ll definitely come in handy. Thanks for sharing such a comprehensive guide!
Thank you for the detailed itinerary for the Mardi Himal Trek! The day-by-day breakdown really helps in planning, and your trail map is a great addition. I can’t wait to experience those stunning views and the unique culture along the way. Any tips on what gear to bring for the trek?
This itinerary looks fantastic! I love how you’ve detailed each day’s trek and the stunning views along the way. I can’t wait to try this route; the trail map is especially helpful. Thanks for sharing your insights!