The Annapurna Base Camp Trek can be done in as little as five days or as many as eight. This trek is difficult with a lot of steep uphill climbs and stairs, so shortening it will make it less enjoyable. We decided on a seven day itinerary and felt happy with it. We met several people who planned to do the trek in four days, and they all ended up doing the same itinerary as us because it was too difficult to make it shorter. This is our Annapurna Base Camp Trek itinerary for 7 days and everything you need to know before leaving.
Annapurna Base Camp Map
Note: This map should not be used for navigational purposes. It is just meant to give an idea of the route and is not perfectly to scale. Download maps.me on your phone for an accurate offline map that is free to use.
Annapurna Base Camp Trek Overview
Trek Duration
This trek takes between 5 and 8 days. We opted for a 7 day itinerary, but we met people who were attempting to do it in 4 days. Honestly, they were planning on walking till it was dark out and it didn’t sound fun. A lot of nights they didn’t make it to the village they planned and ended up staying where we did. I don’t recommend the shorter options unless you can’t spare an extra day and really really want to squeeze this trek in.
Annapurna Base Camp Trek Difficulty Level
We did a 7-day itinerary, and I found this trek to be somewhat difficult. The route goes up and down several valleys which means you are going up a lot of stairs. The Mardi Himal Trek, which is located on the opposite side of the river, is easier than ABC in my opinion.
Required Permits
An Annapurna Conservation Area permit is required for foreigners. It costs 3,000 rupees
Trek History
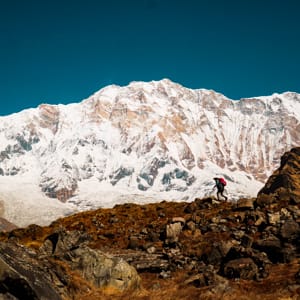
Annapurna I is 8,091m (26,545 ft) high in altitude and it was the first mountain above 8,000m to be successfully climbed. In 1950, Maurice Herzog and his French expedition succeeded in reaching the summit of what is now known as one of the most technically challenging mountains in the world. After that, Annapurna became famous worldwide as others wanted to attempt to follow in their footsteps.
ABC Base Camp became the starting point for future expeditions as the French had succeeded in climbing up the north face of the mountain. By the 1970’s, trekkers started arriving, not to summit the mountain, but to reach the base camp. The Annapurna Base Camp trek became the first in Nepal (local’s claim). In the 70’s, teahouses started being built to meet the demands of tourism. Today, it’s one of the most popular routes in Nepal.
Best Time to do the Annapurna Base Camp Trek
It’s best to do this trek in October or November since that is when the visibility is the best. March and April are the second best time since you’ll still get decent views, and the flowers will be in bloom. It is dangerous to do this trek in monsoon or winter due to landslides and avalanches being a major problem along this route.
Annapurna Base Camp Altitude
Annapurna Base Camp – 4,130 m (13,549 feet)
Tent Peak – 5,695 m (18,684 feet)
Annapurna I – 8,091 m (26,545 feet)
ABC Trek Route Info
The trail to ABC is a well-worn path that’s easy to spot. The route goes up and down the river valley several times which creates a lot of stairs going uphill on the way there and steep downhills on the way back.
The terrain starts in the jungle and the forest becomes sparse as you get closer to Base Camp. This area is known for having landslides and avalanches which is why it isn’t safe to go in monsoon or winter.
Navigating the Annapurna Base Camp Trek
The trail to ABC is extremely easy to navigate. There is one main path that leads you straight up, so it’s difficult to get lost.
I still recommend taking a guide if you are new to trekking. We met someone who fell through the ice on one of the rivers. Him and his daughter were pretty shaken up afterwards. If they’d had a guide with them, the guide could have helped him get out of the river, and it wouldn’t have been so terrifying.
I recommend Maps.me which is a free offline map with the trekking trails on it. It also gives decent estimations of walking times so you can plan the route accordingly.
Packing List
I have a separate post for my packing list as it was too much to include here. Read this blog post for a list of everything I carried with me…
Annapurna Base Camp Packing List
Annapurna Base Camp is also a popular trek for families as it doesn’t go too high in altitude. If you’re planning to trek as a family, make sure to look into the best hiking gear for kids.
Trip Cost
I’ve written an entire post breaking down what we spent on the trek. You can read it here…
Annapurna Base Camp Trekking Cost
ABC Trek Itinerary Options
The 5, 6, 7, and 8-day trek are similar. The major difference is if you spend a day before and after in the starting and ending village of Ghandruk and Jhinu Danda. The second major change is whether you do a sunrise hike to ABC in the morning and then descend quickly, or if you stay there for a night.
Annapurna Base Camp Trek 5 Days
The Annapurna Base Camp 5-day trek is extremely rushed in my opinion. The only people we met who were doing this route were local tourists who had a short vacation from school or work and wanted to cram it in. Most tourists don’t do this route.
Day 1 – Drive from Pokhara to Ghandruk (2.5 hours driving time). Walk from Ghandruk to Chomrong (5 hours and 15 minutes walking time)
Day 2 – Walk from Chomrong to Dovan (4 hours and 45 minutes)
Day 3 – Walk from Dovan to MBC (5 hours 30 minutes)
Day 4 – Walk from MBC to ABC for the sunrise (2 hours), then walk to Dovan (4 hours and 45 minutes)
Day 5 – Walk from Dovan to Jhinu Danda (5 hours walking time), then drive to Pokhara (2.5 hours driving time)
Annapurna Base Camp Trek 6 Days
The 6-day itinerary is a little better than the five-day itinerary, but it doesn’t allow you to spend a day in the gorgeous village of Ghandruk which has beautiful old homes and two museums. Again, I only recommend this if you’re in a rush or if you’ve already been to Ghandruk.
This one is slightly better than the 5-day itinerary because you can either spend two nights at Machhapuchhre Base Camp or spend one night at Annapurna Base Camp. This allows you a whole day of gorgeous sightseeing in the mountains.
Day 1 – Drive from Pokhara to Ghandruk (2.5 hours driving time), walk from Ghandruk to Chomrong (5 hours and 15 minutes walking time)
Day 2 – Walk from Chomrong to Dovan (4 hours and 45 minutes)
Day 3 – Walk from Dovan to MBC (5 hours 30 minutes)
Day 4 – Walk from MBC to ABC for the sunrise or breakfast (2 hours), then back to MBC (1 hours and 15 minutes). Option to spend a night in ABC.
Day 5 – Walk from MBC to Bamboo (4 hours and 20 minutes)
Day 6 – Walk from Bamboo to Jhinu Danda, then drive to Pokhara (4 hours walking time, 2.5 hours driving time)
Annapurna Base Camp Trek 7 Days
The 7-day trek is the most popular. It’s also what we opted to do. We originally planned an 8-day route where we would spend a night in Jhinu Danda to enjoy the hot springs. Since it rained most afternoons on the trek, I was eager to get back to Pokhara for a hot shower and cozy bed.
The Annapurna Base Camp Trek 7-day itinerary allows you to spend a night in gorgeous Ghandruk before the trek and spend two nights in the mountain so you can enjoy the view you walked so far to reach.
Day 1 – Drive from Pokhara to Ghandruk, and spend a night in Ghandruk (2.5 hours driving time)
Day 2 – Walk from Ghandruk to Chomrong (5 hours and 15 minutes walking time)
Day 3 – Walk from Chomrong to Dovan (4 hours and 45 minutes walking time)
Day 4 – Walk from Dovan to MBC (5 hours 30 minutes)
Day 5 – Walk from MBC to ABC for the sunrise or breakfast (2 hours), then back to MBC (1 hours and 15 minutes). Option to spend a night in ABC.
Day 6 – Walk from MBC to Bamboo (4 hours and 20 minutes)
Day 7 – Walk from Bamboo to Jhinu Danda, then drive to Pokhara (4 hours walking time, 2.5 hours driving time)
Annapurna Base Camp Trek 8 Days
The 8-day itinerary gives you ample time to relax and enjoy the trek. You get to spend one night in gorgeous Ghandruk before you begin the long walk to ABC. You get two nights in the mountains to enjoy the views. You also spend one night in Jhinu Danda which is famous for its hot springs. This is the perfect itinerary for those who want to enjoy village life and make the most of their trek.
Day 1 – Drive from Pokhara to Ghandruk, and spend a night in Ghandruk (2.5 hours driving time)
Day 2 – Walk from Ghandruk to Chomrong (5 hours and 15 minutes walking time)
Day 3 – Walk from Chomrong to Dovan (4 hours and 45 minutes walking time)
Day 4 – Walk from Dovan to MBC (5 hours 30 minutes)
Day 5 – Walk from MBC to ABC for the sunrise or breakfast (2 hours), then back to MBC (1 hours and 15 minutes). Option to spend a night in ABC.
Day 6 – Walk from MBC to Bamboo (4 hours and 20 minutes)
Day 7 – Walk from Bamboo to Jhinu Danda (3 hours 30 mins walking time)
Day 8 – Drive from Jhinu Danda to Pokhara (30 mins walking time, 2.5 hours driving time)
Detailed Itinerary Breakdown (7 days)
Day 1 –Drive from Pokhara to Ghandruk
Pokhara Altitude: 822 m (2,696 ft)
Ghandruk Altitude: 1,940 m (6,364 ft)
Daily Altitude Increase: 1,118 m (3,668 ft)
Oxygen Concentration: 80% compared to 100% at sea level
Driving Time: 2.5 hours
Tea house: We decided to stay at Danda Gaun Hotel and Restaurant which is one of the newer hotels in Old Ghandruk. It’s located at the top of a hill which gives it a wonderful view of the mountains behind the old city. The rooms have attached bathrooms with hot water, giant windows for views, balconies, and Wi-Fi.
Daily Details: The drive from Pokhara to Ghandruk isn’t too long. Most of it is on a paved road, but the last section is on a dirt path that winds around steep cliffs. If you get motion sickness, you may want to take some medicine before the drive.
Ghandruk is a gorgeous village, so I highly recommend spending a night here. You can get lost down the winding streets and alleyways. There are two museums to visit, one about Ghandruk and one about Gurung culture. This village has been up-kept with the traditional architecture in certain areas making you feel like you’ve traveled back in time.
Day 2 –Ghandruk to Chomrong
Ghandruk Altitude: 1,940 m (6,364 ft)
Chomrong Altitude: 2,170 m (7,119 ft)
Daily Altitude Increase: 230 m (755 ft)
Oxygen Concentration: 78% compared to 100% at sea level
Walking Time: 5 hours and 10 minutes (not including lunch or tea breaks)
Distance: 9.17 km (5.7 miles) walking distance
Difficulty Level: Difficult
Tea houses: We had lunch in Kimrung Guest House and slept in the Fishtail Guesthouse & Restaurant
Daily Details: The first day of walking starts out a little uninspiring. You spend the first hour on a dirt road which was recently constructed. They built it over the old walking path which is a bummer. You can pay a local jeep to take you past this section if you want to save an hour of walking as it’s not very scenic.
Once you get off the dirt road, you find yourself in Komrong Danda on top of a hill. From here, it’s an hour and a half on a nice trail in the woods down to Kimrung Khola next to the river. I recommend Kimrung Guest House for lunch.
After lunch, you’ll follow the trail uphill for almost two hours. It’s a difficult constant climb, but there is a teahouse at the top for a well-deserved break. After that, it’s a short downhill followed by a semi flat path for about 40 minutes. There are gorgeous views of the rolling hills and the first sneak peak of the Himalaya in the distance.
The final stretch for the day is about 20 minutes of walking uphill, but it’s enjoyable and not too steep. You’ll have a beautiful village to admire on the way until you reach the top of Chomrong.
Pro Tip: Don’t leave later than 8:00am each morning. The lunch stops take a long time to prepare lunch (sometimes an hour). Between the walking times and food breaks, you’ll likely arrive around 2:00pm or 3:00pm each day. Leaving later than that may be an issue as the teahouses along this route fill up quickly. It also tends to rain after 3pm in the mountains or the clouds sweep in making it windy and cold. Not to mention, it obstructs the views. The earlier you leave, the better.
Day 3 –Chomrong to Dovan
Chomrong Altitude: 2,170 m (7,119 ft)
Dovan Altitude: 2,600 m (8,530 ft)
Daily Altitude Increase: 430 m (1,410 ft)
Oxygen Concentration: 74% compared to 100% at sea level
Walking Time: 4 hours and 45 minutes (not including lunch or tea breaks)
Distance: 10.5 km (6.5 miles) walking distance
Difficulty Level: Moderate to Difficult
Tea houses: We ate at the Trekking Guest House in Bamboo and slept in Dovan Guest House
Daily Details: You start the day walking straight downhill through the village of Chomrong. It takes about 50 mins to walk down to the river crossing. From here you cross a suspension bridge and walk back uphill on the other side. It’s a nice stone path and takes about 30 minutes to reach Lower Sinewa.
After Lower Sinewa, it’s a steep uphill climb with almost no flat sections going toward Upper Sinewa. This takes almost an hour. But don’t worry, after that the trail levels out, and it’s a gorgeous walk through the woods. There are some small up and downhills along the way, but nothing too trying. This enjoyable section lasts about an hour and feels like a nice break for the day.
After that, it’s a steep downhill for about 20 minutes to Bamboo where we decided to stop for lunch. We originally planned to sleep in Bamboo, but decided to continue on to Dovan as we still had energy. We ate lunch at Trekking Guest House.
After Bamboo, we got hit with rain. Other than the rain, it was an easy and enjoyable walk from Bamboo to Dovan. It took us about an hour. The path goes through the woods and over some waterfalls.
Pro Tip: Stay in Lower Dovan. The teahouses are much nicer, and Upper Dovan has a problem with landslides.
Day 4 –Dovan to Machhapuchhre Base Camp (MBC)
Dovan Altitude: 2,600 m (8,530 ft)
Machhapuchhre Base Camp Altitude: 3,700 m (12,139 ft)
Daily Altitude Increase: 1,100 m (3,608 ft)
Oxygen Concentration: 65% compared to 100% at sea level
Walking Time: 5 hours and 30 minutes (not including lunch or tea breaks)
Distance: 4.18 km (2.6 miles) walking distance
Difficulty Level: Difficult
Tea houses: We ate lunch at Shangrila Guest House in Deurali, and slept in the Fishtail Guest House in MBC.
Daily Details: The day starts with a short moderate walk to Upper Dovan which takes about 20 minutes. From there, it’s a nice walk through the woods on a stone trail for another 35 minutes with small inclines and declines that aren’t very steep. Here, you’ll reach a gorgeous temple with a view of an epic waterfall cascading down the cliffs. This is the most religious spot on the entire trek, so treat it with respect as you pass through.
After the temple, it’s a steep uphill climb on stone steps for about 40 minutes to the village of Himalaya. We stopped here for a nice cup of tea. After Himalaya, it’s another steady uphill climb to Hinku Cave which is where shepherds used to sleep before the area became a tourist destination with teahouses.
After the cave is a short downhill to the landslide / avalanche zone. There are beautiful views of the waterfall, but it’s important not to stop or stand here for too long. It’s also important not to walk this area too late in the day as the wind picks up causing rocks to fall from above, and the sun begins to melt the snow.
We actually met someone who fell into the ice situated over the river here on the way back down. The man thought he was going to die and his teenage daughter was pretty shaken up. Cross these areas one at a time to avoid putting too much weight in one spot. Don’t stop in the landslide or avalanche areas, and don’t stop on the frozen snow going over the river.
After the landslide zone, it’s an uphill climb to Deurali where you can grab a nice lunch. I don’t recommend staying in Deurali as it’s also known for landslides. From here, you walk another 30 minutes over a landslide zone. Keep 3 meters away from the person in front of and behind you. After the landslide, it’s a gradual increase all the way to MBC.
During our walk, it was windy, cloudy and cold. However, on a nice day, the views here are spectacular with giant hills forming cliffs on both sides of the valley and the Himalaya mountains welcoming you and growing closer and closer as you advance up the path.
Day 5 – Machhapuchhre Base Camp to Annapurna Base Camp to Machhapuchhre Base Camp
Machhapuchhre Base Camp Altitude: 3,700 m (12,139 ft)
Annapurna Base Camp Altitude: 4,130 m (13,549 ft)
Daily Altitude Increase: You sleep at the same altitude as the night before but it’s a 430 m (1,410 ft) increase to ABC
Oxygen Concentration: 62% (at Annapurna Base Camp) compared to 100% at sea level
Walking Time: 2 hours to Annapurna Base Camp and 1 hour and 15 minutes back down to MBC.
Difficulty Level: Easy
Tea house: We had tea at Annapurna Sanctuary Lodge and spent a second night sleeping in the Fishtail Guest House in MBC as it was the nicest teahouse on the entire trek.
Daily Details: I’m not a big fan of sunrise treks in the mountains because I’ve done them several times and don’t feel the need to wake up so early anymore. It’s super cold, and you can’t see because you walk in the dark with just a head torch. For me, I enjoy walking with the gorgeous views. We opted to wake up for the sunrise in MBC and then walk towards ABC when it was just getting light out.
The walk there is difficult only because of the altitude. Otherwise, it’s not very steep or difficult. If you walk slowly and ensure that you aren’t out of breath, then it’s an enjoyable walk with breathtaking views (literally).
It’s best to leave MBC by 7:30 am the absolute latest to ensure you arrive no later than 9:30 am. Clouds tend to roll in around 10am in the mountains which is why so many people do the sunrise hike. We enjoyed a nice cup of tea followed by a photo session before descending back down around 10:45 am so that we’d be back for lunch at 12:00 pm. The clouds started to roll in and block the view around 11:00 am when we were there.
Alternate Options: Some people spend a night in ABC so that they can see the sunrise from there the following morning. That was our original plan, but we changed it for several reasons. I recommend staying two nights in MBC because…
1. You don’t have to carry your bags when you walk up to ABC. All you need is a small daypack with water.
2. The altitude difference from MBC to ABC is 430 m. This whole trek has a pretty drastic increase in altitude, but there’s a rule of thumb not to go more than 300 m each day once you’re at altitude. This is to help you avoid altitude sickness. Even though we felt good, we didn’t want to take a chance. We saw a few people walking back down to MBC at 5pm, my guess is they felt sick and had to descend.
3. This trek has no fires in the teahouses so it’s cold at night. ABC is a lot colder than MBC, so we chose comfort and stayed at MBC for two nights.
4. It’s harder for some people to sleep at altitude (especially over 4,000 m). We don’t have this problem but some of my friends do. If you want a good night’s sleep, it’s better to be lower.
5. You can walk up to ABC at sunrise and then descend back down to Dovan on the same day. We didn’t do this because it’s hard to get to ABC. You walk for days to get here. Why not enjoy the views while you can?
Day 6 – Machhapuchhre Base Camp to Bamboo
Machhapuchhre Base Camp Altitude: 3,700 m (12,139 ft)
Bamboo Altitude: 2,310 m (7,578 ft)
Daily Altitude Decrease: – 1,390 m ( – 4,560 ft)
Oxygen Concentration: 77% compared to 100% at sea level
Walking Time: 4 hours and 20 minutes (not including lunch or tea breaks)
Distance: 10.95 km (6.8 miles) walking distance
Difficulty Level: Moderate
Tea house: We ate lunch in Dovan Guest House and slept in Trekking Guest House in Bamboo.
Daily Details: The day starts with spectacular views of the river valley as you walk from MBC down to Deurali. It’s a mild decline with a few steep sections. Trekking poles are helpful. After Deurali, you cross the landslide area again. This is where someone fell through the ice into the river which left us a little freaked out. Other than that, it’s a beautiful walk past the waterfalls and cliffs along the hills and through the woods. It’s not too steep going downhill but it is a little hard on your ankles and knees.
Next, you reach Himalaya. After that is a steeper downhill towards Dovan. There are a few shortcuts here that can help you bypass some of the downhill. One cuts off the temple and waterfall but saves you from walking down all the steps. You can ask your guide for the shortcut.
We had lunch at Dovan Guest House. See if they have cheesecake available. It’s surprisingly good considering how they don’t seem to have an oven. After Dovan, it’s a 50 minute walk to Bamboo with some steep uphills and downhills and flat areas mixed in between. It started to rain and got cold and cloudy, so we stayed in Bamboo. If you want, you can keep walking further to Upper Sinewa, but we felt it was unnecessary.
Day 7 – Bamboo to Jhinu Danda to Pokhara
Bamboo Altitude: 2,310 m (7,578 ft)
Jhinu Danda: 1,780 m (5,839 ft)
Daily Altitude Decrease: – 530 m ( – 1,738 ft)
Oxygen Concentration: 82% (in Jhinu Danda) compared to 100% at sea level
Walking Time: 4 hours (not including lunch or tea breaks)
Distance: 9.17 km (5.7 miles) walking distance
Difficulty Level: Difficult
Tea house: We ate lunch in Chomrong at the top of the hill in the Fishtail Guest House and Restaurant. We decided not to spend a night in Jhinu Danda, however the Hotel Evergreen and Restaurant looked nice.
Daily Details: From Bamboo to Upper Sinewa there’s a steep 20 minute uphill climb followed by a mix of flat and uphill sections for the next hour. After that, you start to go downhill to Lower Sinewa where we stopped for tea at Himal Guest House and Restaurant.
From Lower Sinewa to Chomrong is difficult. It’s 20 minutes straight downhill to the river, followed by a steep uphill climb to the top of Chomrong on a stone staircase that seems to never end. It took us about an hour to get uphill in the direct sunlight. I walk slow when there’s no shade and struggled here. Other people did this section a lot faster than me.
We ate lunch in Chomrong at Fishtail Guesthouse and Restaurant at the top of the hill. After lunch, it’s another steep downhill to Jhinu Danda. It takes about 30 minutes to get there, but it’s an additional 30 minutes downhill to the jeep stand. You also get to cross one of the longest suspension bridges in Nepal. Make sure no mules or animals are crossing before you begin.
Pro Tip: Hire a driver through your hotel in Pokhara and make sure they have 4 wheel drive. We saw three jeeps break down and our driver told us a few had gone off the road which resulted in several deaths.
Our hotel in Pokhara arranged our jeep to Ghandruk and the driver was fantastic and understood that he should drive slowly and carefully. He wasn’t available on the way back, so we hired a local driver and he drove like a maniac. I’ve never once yelled at or even told a driver how to drive in Nepal, but this guy was crazy. It’s the first time I’ve ever asked a driver to slow down and when he didn’t listen I yelled at him. Those of you who know me, know it takes a lot to make me yell at someone.
Our hotel told us that the local drivers don’t always know to drive slower for tourists and that the hotels often explain to their drivers how to make customers happy. So, I highly recommend booking someone reliable through the hotel even if it costs a little extra.
Annapurna Base Camp Village Guides
Machhapuchre Base Camp Village Guide
Annapurna Base Camp Village Guide
You might also like…
Michelle Della Giovanna
Writer at Full Time Explorer
I’m just your average New Yorker who quit her job in the fashion industry to explore the world. Come find out what it’s like to trade in five-inch heels for squat toilets.
For beginners, they can also trek to 10 days Annapurna base camp trek maintaining the pace & by aclimizing properly.