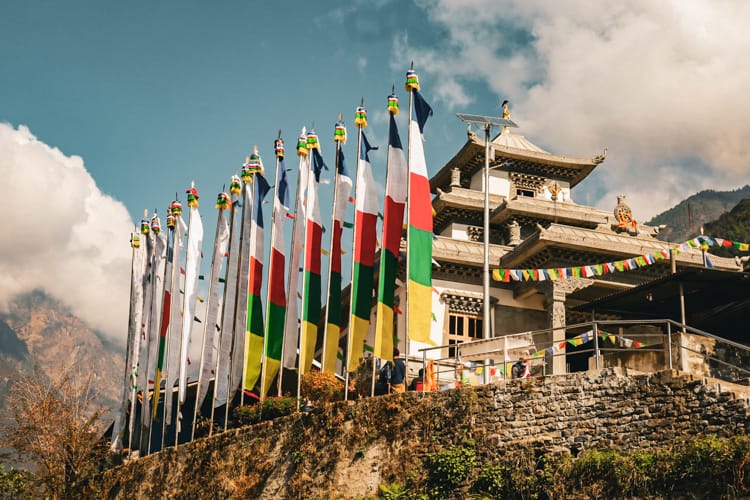
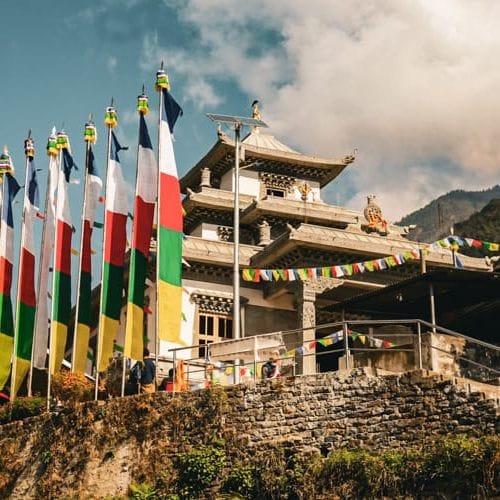
The Helambu Trek was originally known as a cultural trek through small villages inhabited by the Yolmo (Hyolmo) people. Unfortunately, after the 2015 earthquake, the area suffered severe damages and many of the old buildings have since been replaced with modern concrete, and parts of the trekking trail were replaced by roads. That being said, this area is one of the few places you can experience Yolmo (Hyolmo) culture.
It’s also known as a pilgrimage trek for Tibetan Buddhists who want to follow in the footsteps of Guru Rinpoche (the founder of Tibetan Buddhism) who walked through these areas around 600 years ago. The trek took us eight days to complete via the Gosaikunda to Sermathang route.
Helambu Trek Map
Note: This map should not be used for navigational purposes. It is just meant to give an idea of the route and is not perfectly to scale. Download maps.me on your phone for an accurate offline map that is free to use.
Helambu Trek Overview
Trek Duration
The Helambu Trek has several different routes. We combined it with the Gosaikunda Trek and took the route via Sermathang. This is an 8 day trekking route.
Helambu Trek Difficulty Level
I found this trek to be extremely difficult. The sections leading up to Gosaikunda are straight uphill with a major increase in altitude. If you are not in good shape, this trek will be hard. I recommend training on stairs or a stair-stepper every day for at least a month to prepare.
Required Permits
A Langtang National Park permit is required. It can be purchased in advance in Kathmandu for 3,000 rupees. Check times for the Nepal Tourism Board office as the Langtang desk closes before the other permit desks each day. You can also buy one on the way to Dhunche at the park entrance.
Helambu Trek History
Guru Padmasambhava Rinpoche (the founder of Tibetan Buddhism) visited the Helambu area around 600 years ago to meditate. Legend says that he heard from other Lamas (gurus) that the area was sacred. It’s said that to be born in the area or to have visited is a good deed and gives good karma.
Today, people come to visit the Nyinda Rengjon Meditation Cave in Melamchi Ghyang where Guru Rinpoche meditated. Some followers believe that meditating in the same spots as Guru Rinpoche enhances the meditation and helps them to reach enlightenment.
Near Tarkeghyang, the most popular thing to do is climb Ama Yangri Peak. Located at a height of 3,771 m (12,372 ft), this peak is considered a holy pilgrimage site for Tibetan Buddhists. It’s believed that Guru Rinpoche visited Tarkeghyang and the peak.
Locals told us that Ama Yangri is considered the wife or female counterpart to Lirung (a peak in Langtang Valley). They also said that Ama Yangri has five sister peaks in the area. Yangri (the goddess of the mountain) is considered the protector of the village. The trek takes approximately 6 hours up and back. Many believe that if you make a wish at the top of the peak or ask for something from the goddess of the mountain, she will grant your wish.
Best Time to do the Helambu Trek
The best time to trek anywhere in Nepal is October and November because the visibility and weather is the best. The second best time to trek is usually March and April but in the last few years the views have not been as good.
Helambu Weather
Weather in the mountains changes frequently. There’s even a joke in Nepal that if you don’t like the weather in the mountains, just wait five minutes. Weather conditions are best in October and November. Although it’s cold, it’s the safest time to visit with the best views.
Helambu Trail Info
The Helambu trek route is typically a well laid staircase going uphill. In some areas, it’s a dirt path. Towards Gosaikunda, the trek is not steep, but it does go consistently uphill with almost no downhill. On the way down through Helambu, you’ll go down some steep hills and then find yourself walking through beautiful forests and small cities. Towards the end of the route, the trekking trail has sadly been turned into a dirt road which is much less enjoyable to walk on.
Navigating the Helambu Trek
Navigating the first half of this trek is extremely easy as the Gosaikunda trek route is a well traveled trail. After Gosaikunda, the trail through Helambu is a little harder to navigate. I’d recommend having a guide as it would be easy to get lost below Melamchi Ghyang.
I always recommend downloading maps.me before leaving. This is a free app with the trail that can be used offline (as long as you download the area map in advance).
Packing List
I have a separate post for my packing list as it was too much to include here. Read this blog post for a list of everything I carried with me…
Helambu Nepal Trek Packing List
Trip Cost
I’ve written an entire post breaking down what we spent on the trek. You can read it here…
Helambu Trek Route Options
Gosaikunda to Helambu Trek via Sermathang – 8 Days
This is the route we opted to do as I hadn’t been to Gosaikunda yet and wanted to see the lake. I’m glad we did this route because I felt the Gosaikunda half was the most beautiful part. I was looking forward to the cultural aspect of Helambu, but many of the old buildings were destroyed in the 2015 earthquake and modern cement has taken its place.
Day 1 – Kathmandu to Dhunche by Jeep
Day 2 – Dhunche to Chandanbari
Day 3 – Chandanbari to Gosaikunda
Day 4 – Gosaikunda to Ghopte
Day 5 – Ghopte to Melamchi Ghyang
Day 6 – Melamchi Ghyang to Tarkeghyang
Day 7 – Tarkeghyang to Sermathang
Day 8 – Sermathang to Kathmandu by Jeep
Gosaikunda to Helambu Trek via Sundarijal- 8 Days
Suraj had done the Helambu Trek a few years before the earthquake and he enjoyed the route via Sermathang better. We also have some friends who like staying in Sermathang, so we decided on that route. All the tours that were coming down from Gosaikunda went the other direction towards Sundarijal. Having only done one direction, I can’t say which is better.
Day 1 – Kathmandu to Dhunche by Jeep
Day 2 – Dhunche to Chandanbari
Day 3 – Chandanbari to Gosaikunda
Day 4 – Gosaikunda to Ghopte
Day 5 – Ghopte to Kutumsang
Day 6 – Kutumsang to Chisapani
Day 7 – Chisapani to Sundarijal
Day 8 – Sundarijal to Kathmandu by Jeep
Helambu Trek – 8 Days
This route focuses strictly on the Helambu region and does not include Gosaikunda. Gosaikunda was my favorite part of the trek, and the only part where we could see the Himalaya mountains clearly. I’d only recommend Helambu by itself if you are on a Buddhist pilgrimage, or you do not want to ascend in altitude. Otherwise, I recommend the above two options.
Day 1 – Kathmandu to Sundarijal by Jeep
Day 2 – Sundarijal to Chisapani
Day 3 – Chisapani to Kutumsang
Day 4 – Kutumsang to Tharepati
Day 5 – Tharepati to Tarkeghyang
Day 6 – Tarkeghyang to Sermathang
Day 7 – Sermathang to Kathmandu by Jeep
Detailed Helambu Trek Itinerary Breakdown (8 days)
This is a breakdown of the route from Gosaikunda to Sermathang which we followed over eight days.
Day 1 – Kathmandu to Dhunche
Kathmandu Altitude: 1,400 m (4,593 ft)
Dhunche Altitude: 1,960 m (6,430 ft)
Daily Altitude Increase: 560 m (1,840 ft)
Oxygen Concentration: 80% compared to 100% at sea level
Driving Time: 5.5 hours
Tea house: Namaste Gosaikunda Hotel & Lodge
Daily Details:
There are two routes to get to Dhunche. We took the route via Tokha since we had hired a private jeep. Along the way, we got to see amazing views of Ganesh Himal and Langtang. We stopped for lunch at Kerung Highway Resort. We also stopped there when we did Langtang last year.
The road is bumpy in some sections with lots of cut back and hairpin turns. I highly recommend a jeep with four wheel drive as we’ve seen many buses and jeeps get stuck during our travels in Nepal. If you get motion sickness, you may want to take medicine in advance because of the sharp turns and speed.
Along the route, you need to go through several police checkpoints as the Tibetan border is nearby. Make sure to have a copy of your passport somewhere easy to reach. Do not put it in your luggage as you’ll need to show it at every stop. Drones are not allowed in the area. They will check your bags and will confiscate them.
Day 2 – Dhunche to Chandanbari (Sing Gompa)
Dhunche Altitude: 1,960 m (6,430 ft)
Chandanbari Altitude: 3,330 m (10,925 ft)
Daily Altitude Increase: 1,370 m (4,495 ft)
Oxygen Concentration: 68% compared to 100% at sea level
Walking Time: 4 hours and 45 minutes walking time (not including lunch or tea breaks). We took two tea breaks which were a half hour each. We also took a 45 minute lunch break. The total travel time was 6 hours and 30 minutes.
Distance: 7.4 km (4.6 miles) walking distance
Difficulty Level: Very Difficult
Tea house: Buddha Guest House or Red Panda Inn
Daily Details: The first day of walking is extremely difficult because it is almost entirely uphill. The day starts off by following a dirt road through town for about 30 minutes. After that, it’s a short walk in the jungle along the river for 20 minutes followed by a steep uphill climb for almost an hour.
We decided to take a long tea break after the uphill climb at Srijana Hotel & Lodge for 30 minutes. From there it’s another hour straight uphill with no flat areas for an hour. We had lunch at Deurali Hotel & Lodge which took 45 minutes. Often, the teahouses cook items from scratch, so it can sometimes take over an hour for lunch. If you have a porter, you can send them ahead with your lunch order to save time.
After lunch, it’s yet another 45 minutes of climbing uphill. Here you’ll reach a small viewpoint. From the viewpoint, you’ll go uphill until you arrive in Dhimsa. This section is not as steep as the previous portions, but it is still uphill. We stopped for another tea break in Dhimsa because I was exhausted. The last section from Dhimsa to Chandanbari is also uphill, but it’s not nearly as bad as the first half of the day.
Overall, this is one of the hardest days of trekking I’ve ever completed. I was so tired at the end that I crashed into the bed. We had originally planned to walk to Laurebina, but there was no way we would have made it there.
Pro Tip: Do training in advance by using a stair stepper or going up and down a set of stairs at least 20 times a day.
Day 3 – Chandanbari to Gosaikunda
Chandanbari Altitude: 3,330 m (10,925 ft)
Gosaikunda Altitude: 4,380m (14,370 ft)
Daily Altitude Increase: 1,050 m (3,445ft)
Oxygen Concentration: 60% compared to 100% at sea level
Walking Time: 5 hours and 15 minutes walking time (not including lunch or tea breaks). We stopped for a 40 minute tea break and a 40 minute lunch break along the way. Our total travel time was 6 hours and 35 minutes.
Distance: 9 km (5.6 miles) walking distance
Difficulty Level: Difficult
Tea house: Namaste Guest House
Daily Details:
The day starts with a beautiful path that wraps around the hills in the sunshine. It’s fairly flat with some steady but not steep uphill sections. Make sure to look behind you once in a while as the views behind you are beautiful on a clear day.
After a little over an hour, the trail turns into a pine forest. Through the trees on the left, you get glimpses of the Himalaya mountains. There’s an uphill climb through the woods, but it’s not as bad as day one. The views are stunning and it makes the trek worth every step.
After 25 minutes, you’ll reach Cholangpati for tea. We stopped at Hotel Langtang Lirung View for 30 minutes to take in the views and enjoy the fresh morning air.
From here, the path goes uphill the rest of the way until you reach Laurebina. This takes about an hour, but the views are indescribably beautiful. We probably stopped to take photos every 100 feet. This section is, in my opinion, the best part of the trek, so enjoy it and don’t rush too much.
We had lunch in Laurebina at the Mountain View Rest House so that we could enjoy the epic views. I don’t think I’ve ever seen so many mountains this close up. Usually, you only see one major mountain at a time which makes this place special. I wish we had added an extra day to stay here like many of the other travelers did.
It takes us about an hour and fifteen minutes to get to the top of the hill above Laurebina. Other people breezed past us, but I was struggling with the altitude increase and my body hurt from the steep climb the day before. We also stopped for a lot of photos while tour groups seemed on a mission to get to the top as fast as possible. At the top, there’s a nice area to sit with a small Buddha statue and prayer flags dancing in the wind.
The next section runs along the cliffs. There are some steep uphill areas mixed in but nothing too bad. It feels much worse because of the altitude. Unfortunately, I was struggling at this point. I tend to hit a wall after so many hours of walking. I now know this is because I have Fibromyalgia, but I basically get so exhausted that I can’t cope. During the walk along the cliffs, my whole body ached. It took us about two and a half hours, but it took most people two hours to get to Gosaikunda from Laurebina.
Gosaikunda is a tiny village with views of a few different lakes. We arrived around 3:15pm after walking slowly, stopping for photos, and struggling with the fast increase in altitude. Once we arrived, we did an acclimation hike nearby to help us adjust to the altitude. We also decided to take altitude medicine. We almost never take Diamox, but the altitude increase on this trek is fast. If you stay in Laurebina you may not need medicine. Make sure to ask a doctor before using it as there are side effects.
Pro Tip: Leave early so that you can get to Laurebina early enough to enjoy the clear skies. Clouds tend to roll in around 10:30am in the mountains. If you can, add a night to your itinerary to sleep in Laurebina because it’s the most beautiful part of the trek.
Day 4 – Gosaikunda to Ghopte
Gosaikunda Altitude: 4,380 m (14,370 ft)
Ghopte Altitude: 3,430 m (11,253 ft)
Daily Altitude Decrease: 950 m (3,117 ft)
Oxygen Concentration: 67% compared to 100% at sea level
Walking Time: 6 hours and 35 minutes (not including lunch or tea breaks). It took us 3 hours and 35 minutes to reach Phedi. From Phedi to Ghopte is 3 hours. We had two 15 minute tea/snack breaks and lunch took 35 minutes.
Distance: 11.26 km (7 miles) walking distance
Difficulty Level: Difficult
Tea house: Namaste Guest House
Daily Details:
In the morning, we visited the lake and did a small puja (religious ceremony). We left Gosaikunda slowly around 9am. We climbed the hill above the lake and the views were spectacular, so we took our time with photos and had a small snack at the top. Besides the first set of stairs, it’s not too steep, and it’s an enjoyable walk with epic views.
When you start to descend, you’ll pass through a rock slide zone. Don’t stop here for photos or snacks. Keep a steady pace until you pass this area as it’s not safe to linger. It’s important to be here before 10am when the winds pick up.
The rest of the way to Phedi is steep stone stairs going straight downhill. If you need a knee, back or ankle brace, it’s best to wear it on this day. We had a quick lunch at Phedi as we were eager to get to our teahouse for the night due to dark clouds rolling in. We ate at Hotel Phedi Dawn Baby.
After lunch, the route down feels like you are still going uphill. You go down and up and down and up and down and up multiple times until you end up at the same altitude as Phedi. The views of the rolling hills above the clouds are beautiful, but it’s exhausting. We stopped for tea at Himalayan Sherpa Hotel in Upper Ghopte.
After tea, there are more uphills and downhills all the way to Ghopte. We arrived at 5:30pm just as the sun was setting. Overall, today was difficult because it was such a long day with so many ups and downs.
Day 5 – Ghopte to Melamchi Ghyang
Ghopte Altitude: 3,430 m (11,253 ft)
Melamchi Ghyang Altitude: 2,530 m (8,300 ft)
Daily Altitude Decrease: 900 m (2,953 ft)
Oxygen Concentration: 75% compared to 100% at sea level
Walking Time: 5 hours and 20 minutes (not including lunch or tea breaks). Most people could do this an hour faster, but we were struggling with an injury and had to go slower. It took 2 hours and 10minutes to reach lunch. We had to wait for lunch to cook and enjoyed the rest, so our lunch break was 2 hours. It was another 3 hours and 10 minutes to Melamchi Ghyang.
Distance: 7.56 km (4.7 miles) walking distance
Difficulty Level: Difficult if downhills are hard for you. Otherwise, it’s moderate.
Tea house: Hotel Eco-Friendly
Daily Details:
We left Ghopte around 8:40am. The day starts with a downhill climb for 2o minutes. After that, it’s a mix between uphill stairs and mild inclines with some flat areas in between. It’s a nice route that isn’t too difficult. After some time, you hit a steep stone staircase that takes about 30 mins to ascend.
From there, it’s a mix between more uphill climbs and flat areas through rhododendron forests, pine trees and open fields. One last steep incline takes you up to Thadepani.
We had an early lunch at Sumcho Top Lodge in Thadepani. It took a long time for them to make everything from scratch, but this was our favorite dal bhat on the entire trek. We even talked about taking a family trip to stay here because there are beautiful views of the mountains (Gaurishankar and Dorje). It’s best to arrive before 10am or the clouds roll in making it difficult to see.
After lunch, it’s a steep downhill through the woods with lots of steps. When you exit the woods, you’ll walk on a nice flat section for a short while before reentering the woods for another steep decline. This is the part we struggled with, so most people could do this much faster. After that, you cross a bridge and arrive in Melamchi Ghyang.
Day 6 – Melamchi Ghyang to Tarkeghyang
Melamchi Ghyang Altitude: 2,530 m (8,300 ft)
Tarkeghyang Altitude: 2,600 m (8,530 ft)
Daily Altitude Increase: 70 m (230 ft)
Oxygen Concentration: 74% compared to 100% at sea level
Walking Time: 3 hours and 30 minutes (not including lunch or tea breaks). It’s a 1 hour and 30 minute walk to Nakote. We went on a tour of the village and ate lunch which took us 2 hours. It’s another 2 hours to Tarkeghyang.
Distance: 6.92 km (4.3 miles) walking distance
Difficulty Level: Moderate
Tea house: Hotel Tarkeghang
Daily Details:
We left Melamchi Ghyang at 9:00am. From there it’s a nice downhill through the woods. The path cuts through the road a few times. It’s not too steep compared to the day before and is an enjoyable hour walk downhill.
At the bottom of the hill, you cross a suspension bridge and walk up through the village of Nakote. We arrived during a funeral, which in most cultures would be a somber occasion, but in Nakote it was more of a celebration of life. The whole village was at the monastery.
The women were preparing a giant feast or chanting prayers and the men were chatting and drinking Tibetan tea. In true Nepali fashion, we were invited to join. They were rebuilding the monastery after it was ruined in the 2015 earthquake, and we got to see the artisans at work as they carved the details into the cement. After a few bowls of Tibetan tea, we made our way up to Zambala Guest House where we ate lunch.
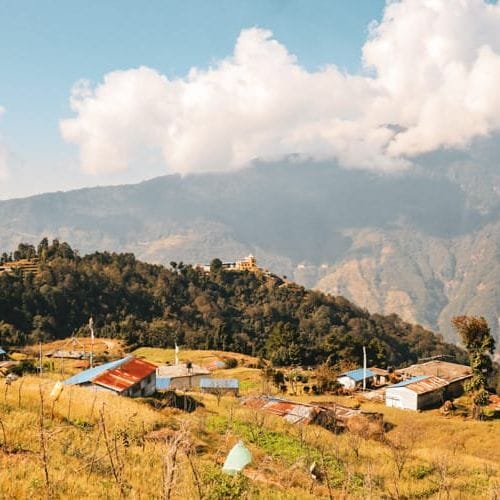
Nakote filled me with joy, and it had such a happy positive vibe. They gave us the best Tibetan tea I’ve ever had at the monastery. I usually don’t like butter tea, but this was really good. Nakote is a beautiful village full of fresh flowers and brightly painted homes. It made me feel like the last few days’ walk was worth it and showed me the heritage trail is still full of culture if you know where to look for it.
We left Nakote after lunch, but the path from here was confusing. Make sure to use maps.me because this section is hard to navigate. It’s a pretty steep climb up on a proper trekking trail that’s narrow with stones to climb like a rock scramble. It’s a nice path but a little tiring and steep, and it cuts through the road making it hard to find the starting points.
As you approach Tarkeghyang, you’ll be on the main dirt road until you reach your teahouse.
Day 7 – Tarkeghyang to Sermathang
Tarkeghyang Altitude: 2,600 m (8,530 ft)
Sermathang Altitude: 2,590 m (8,497 ft)
Daily Altitude Decrease: 10 m (32 ft)
Oxygen Concentration: 74% compared to 100% at sea level
Walking Time: 3 hours and 30 minutes (not including lunch or tea breaks). We stopped for tea at a friendly locals house on the way. We waited until we reached Sermathang for lunch.
Distance: 10.78 km (6.7 miles) walking distance
Difficulty Level: Easy
Tea house: Yangri-ma Eco Lodge
Daily Details:
The walk from Tarkeghyang to Sermathang isn’t very inspiring. Unfortunately, the trekking route was replaced by a road. I wish a new route had been established in its place but it hasn’t. You basically walk along a dusty road in direct sunlight for 3.5 hours. We did get to see some monkeys in the trees on the side of the road. We also stopped in Ghangyul and had tea with a lovely local family who invited us into their home after we purchased some kiwis from them.
We arrived in Sermathang around 1:00pm, but it was another 20 minutes up to Yangri-ma Eco-Lodge where we planned to spend the night. Overall, we probably would have hired a jeep from Tarkeghyang back to Kathmandu if it hadn’t been so expensive.
Day 8 – Sermathang to Kathmandu
Sermathang Altitude: 2,590 m (8,497 ft)
Kathmandu Altitude: 1,400 m (4,593 ft)
Daily Altitude Decrease: 1190 m (3,904 ft)
Oxygen Concentration: 85% compared to 100% at sea level
Driving Time: 3.5 hours – 4 hours depending on road conditions and traffic.
Daily Details:
We hired a private jeep and left right after breakfast so that we could be home in Kathmandu by lunch. The ride has some bumpy spots, but overall it wasn’t too bad compared to the ride to Dhunche.
Helambu Trek Village Guides
Dhunche, Nepal: Village Guide for Trekkers
Chandanbari (Sing Gompa), Nepal: Village Guide
Gosaikunda, Nepal: Village Guide
Ghopte, Nepal: Village Guide for Trekkers
Melamchi Ghyang, Nepal: Village Guide
Nakote Ghyang, Nepal: Village Guide
Tarkeghyang, Nepal: Village Guide
Sermathang, Nepal: Village Guide
You might also like…
Michelle Della Giovanna
Writer at Full Time Explorer
I’m just your average New Yorker who quit her job in the fashion industry to explore the world. Come find out what it’s like to trade in five-inch heels for squat toilets.
Leave a Reply